In other ways, this program is the way for the developers to get into contact with the Windows 10 working and the complete information regarding that and all that is done to improve the quality of future releases.
Opt-Out of the Customer Experience Improvement Program in Windows 10
But as nobody could tell about the exact information that the program shares with the developers so, for security reasons, users would like to disable that program. Here in this article, we have written about the method through which Windows 10 users could get themselves out of the customer experience program.
1. Using Control Panel
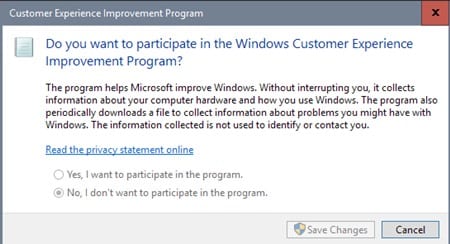
Open the Control Panel on your Windows 10. Now you have to search for the Customer keyword in the Control Panel search bar, and then from the results, click on the Change Customer Experience Improvement Program Settings. In the next Windows on your screen, look for another option named “No, I Don’t want to participate in the program” and then select it using the radio button. Click on the Save Changes button, and that’s all. The CEIP would be disabled from then onwards!
2. From Task Scheduler
Search the Task Scheduler in the Start Menu and open it. Using the left panel, go to the folder Task Scheduler Library > Microsoft > Windows > Application Experience and once you reach up there, select all the tasks in the middle panel and disable these all by using the right-click menu options. That’s all!
- Using Group Policy Editor
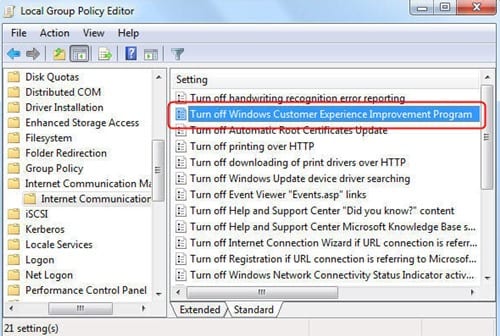
Press up the “Win + R” keys on your keyboard while using Windows 10 and then type in “gpedit.msc” in the panel that appears, and after that, click the Enter button. This would open up the Group Policy Editor on your Windows. Inside that, navigate to “Computer Configuration > Administrative Templates > System > Internet Communication Management > Internet Communication Settings“. Find the option named “Turn off Windows Customer Experience Improvement Program” that appears in the right panel and double-click on it. This will bring up the policy settings window, select the Enabled radio button and click on the OK button to save the changes. The CEIP would then be disabled!!
4. Using Registry Editor
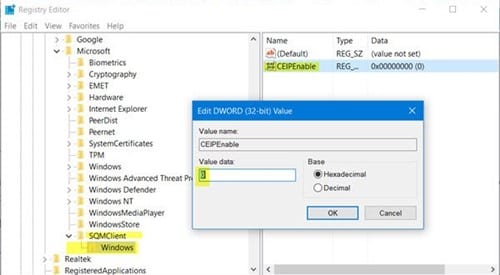
Press “Win + R” and type in ‘Regedit’ and then press enter to bring up the Registry Editor on your Windows. Inside the Registry Editor, navigate to the location HKEY_LOCAL_MACHINE\SOFTWARE\Policies\Microsoft\SQMClient. After that, click on the Microsoft key, and select the option New>Key. Name up the new key as SQMClient and then press the enter button. Create another key called Windows in the same way and then select it, right-click on the right panel and select “New > DWORD (32-bit) Value”. Name it “CEIPEnable” and check its value which should be ‘0’. If it does not, change it to ‘0’ and save it up. Restart your system, and the CEIP should be disabled!
So, these are the few best ways to opt-out of the customer experience improvement program in Windows 10. If you need more help disabling the feature, let us know in the comments below.


