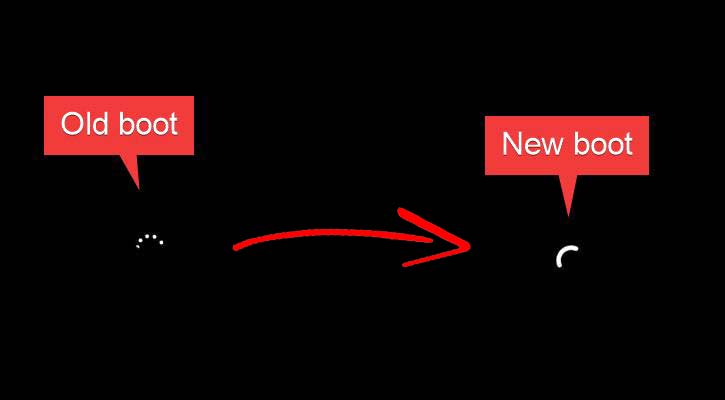
The latest builds of Windows 11 come with a vibrant boot screen called progressive ring animation. The progressive ring animation is kept hidden from Windows users, and it needs to be enabled manually.
So, if you are interested in enabling the new boot screen animation in Windows 11, you are reading the right guide. In this article, we will share a step-by-step guide on how to enable new boot screen animation in Windows 11. Let’s check out.
How to Enable the Hidden Boot Screen Animation in Windows 11
Before following the steps, please note that the progressive ring animation is available on Windows 11 build 22449 and later. So, follow the steps only if you are using the latest version of Windows 11. Important: To enable the new boot screen, we have to make certain changes to the Registry. Therefore, it’s recommended to create a restore point or a system image backup before implementing the steps.
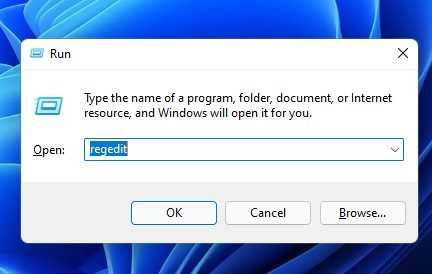
First of all, press the Windows Key + R button to open the Run Dialog box.
On the Run dialog box, enter regedit and hit the Enter button.
This will open the Registry Editor on your Windows 11. You need to navigate to the following path:
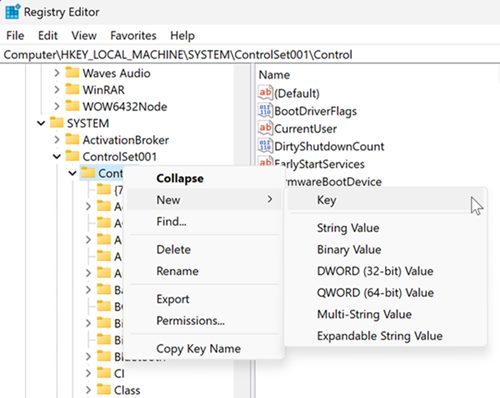
Right-click on the Control folder, and select New > Key.
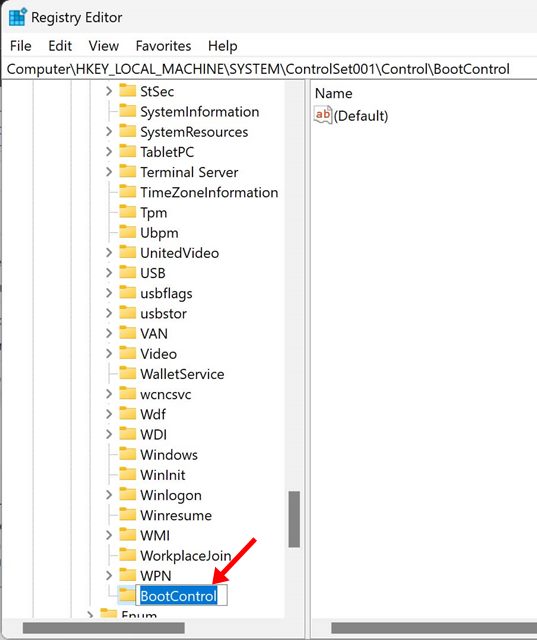
Name the new key as BootControl.
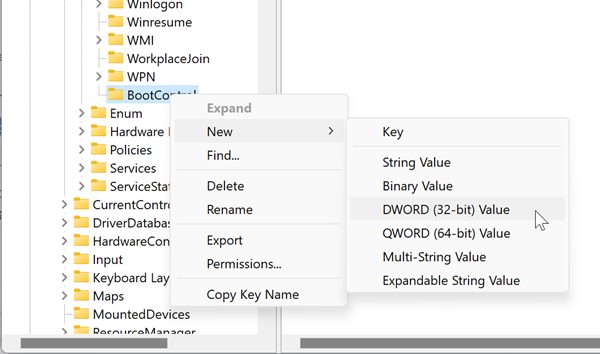
Once done, right-click on the BootControl folder and select New > DWORD (32-bit) Value.
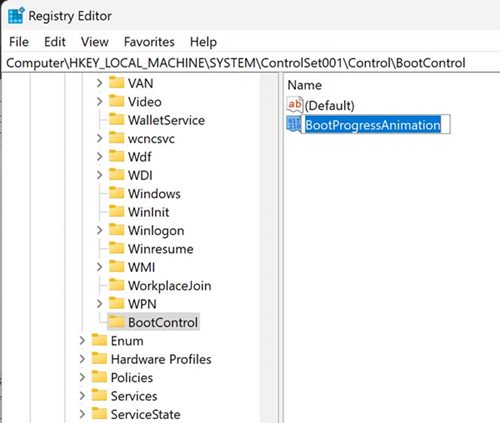
Name the new DWORD key as BootProgressAnimation.
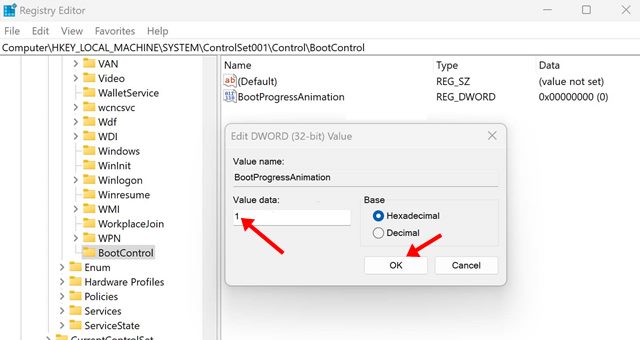
Now double click on the BootProgressAnimation key, and on the value data field, enter 1. Once done, click on the Ok button.
That’s it! You are done. After making the above changes, restart your Windows 11 PC. You will now see the new boot screen animation on your Windows 11. The new boot screen animation looks good, but it’s available only on the latest builds of Windows 11. I hope this article helped you! Please share it with your friends also. If you have any doubts related to this, let us know in the comment box below.
